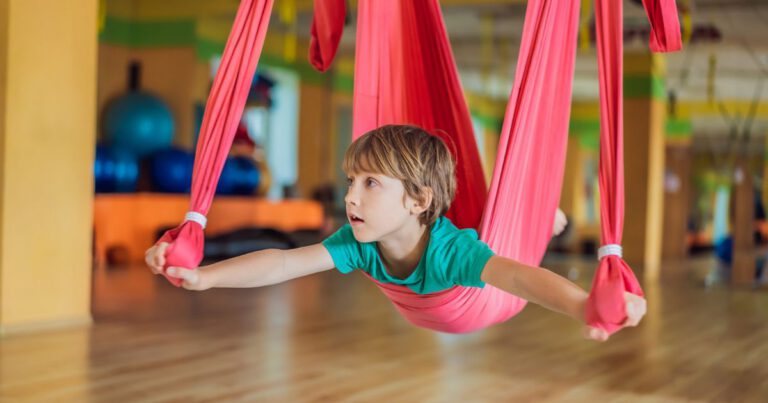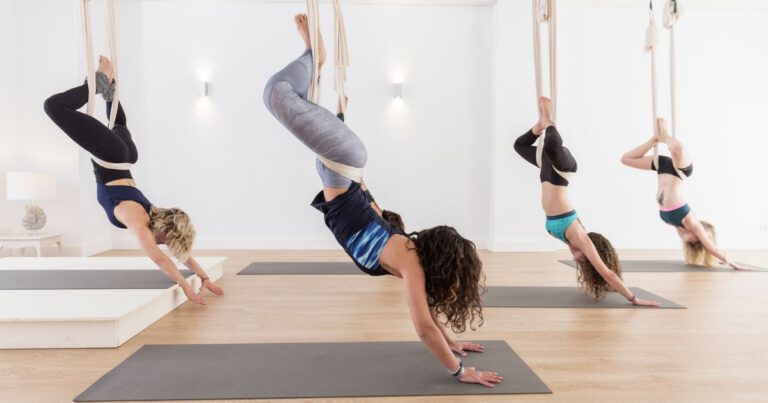
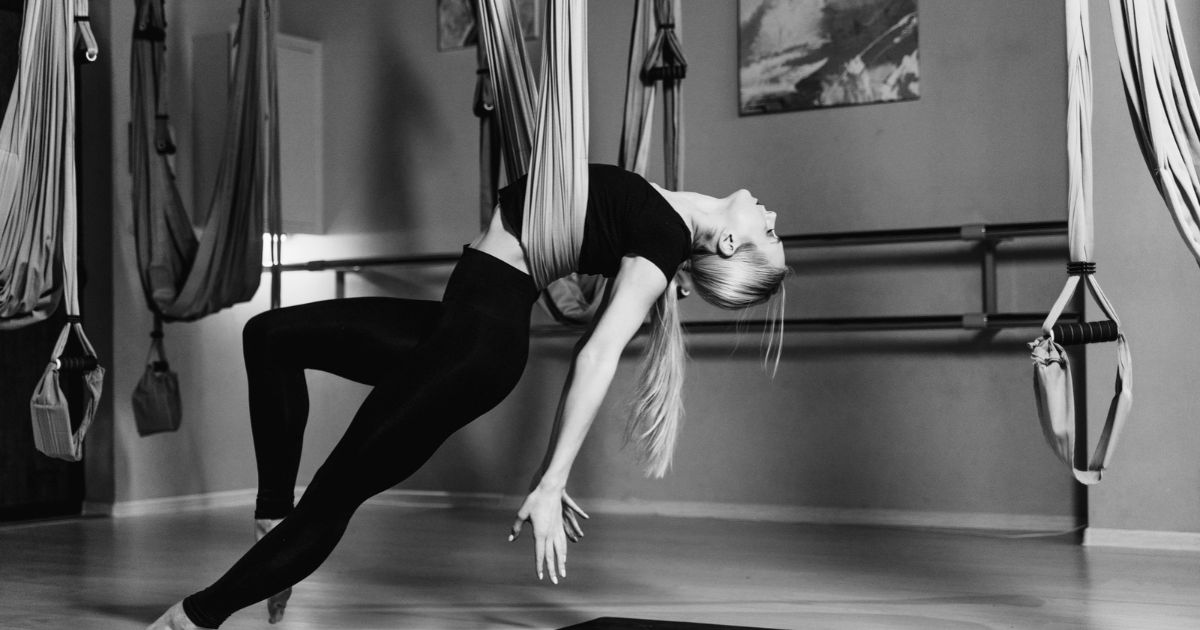
Stretching in an aerial hammock feels different from stretching on a mat. The fabric holds part of your weight, so you can relax into a stretch instead of fighting gravity for it, and you can change the support as you go.
This is the routine I’d give a student who has a hammock at home and wants a calm, safe 20 minutes. I’ve practiced aerial yoga since 2008 and have taught it for years as a qualified yoga teacher, and these are the stretches I come back to on days when I just want to move and loosen up. You don’t need to go upside down. The one gentle inversion is optional.
After the routine, I explain why flexibility matters so much in aerial yoga and how to build it safely over the months ahead.
What are the best aerial yoga stretches for beginners?
The best aerial yoga stretches for beginners use a low hammock, at about knee height, for support: a supported squat, side and chest stretches holding the fabric, a hamstring stretch and a low lunge with one foot in the hammock, and a reclined figure-four. Warm up first, hold each stretch for about 30 seconds, and stop at tension, not pain.1
What you need and how to set up
You need a fabric aerial hammock hung from a properly rated anchor, a yoga mat and about an arm’s span of clear space all around. Yoga blocks and a sturdy chair are handy but optional. If you’re still putting your set-up together, our guide to aerial yoga equipment for home covers everything, and our aerial rigging guide explains how to hang it safely.
For most of the routine, set the hammock low, with the bottom of the loop at about knee height. You only raise it for the optional inversion, to the creases at the front of your hips. If changing the height takes a while with your set-up, skip the inversion today and add an extra minute to the cool-down.
Wear fitted clothes that cover the backs of your knees, and take off rings and watches that could snag the fabric. Our guide to what to wear for aerial yoga has more tips.
Before you start: how to stretch safely
Don’t skip the warm-up. Stretching muscles before they’re warmed up can hurt them, and five to 10 minutes of light activity, such as a quick walk, is enough.1 Once you’re warm, hold each stretch for about 30 seconds, don’t bounce, and expect to feel tension but never pain.1
Yoga is generally considered safe for healthy people when it’s done properly with a qualified teacher, and the most common injuries are sprains and strains.2 If you have an injury, knee or hip problems, a spine condition, severe high blood pressure, balance problems or glaucoma, you may need to adapt some stretches. Pregnant women, older adults and people with health conditions should talk to their doctor and their teacher first.2
How to breathe through each stretch
Breathe in and out through your nose if you can. Use each in-breath to lengthen, and each out-breath to soften a little further into the stretch. Five or six slow breaths is about 30 seconds, so you can count breaths instead of watching a clock.
The 20-minute routine at a glance
| Part | Time | What you’ll do | Hammock height |
|---|---|---|---|
| 1. Ground warm-up | 5 minutes | Marching, cat-cow, shoulder, hip and ankle circles | Not used |
| 2. Low-hammock stretches | 10 minutes | Supported squat, side stretch, chest opener, hamstring stretch, low lunge, reclined figure-four | About knee height |
| 3. Optional gentle inversion | 2 minutes | Supported forward fold | At your hip creases |
| 4. Cool-down | 3 minutes | Child’s pose, lying twist, resting breath | Not used |
Part 1: Ground warm-up (5 minutes)
The aim here is to get a little warmer and loosen your joints before you load them. You should feel slightly warm, not out of breath.
- March or walk on the spot (2 minutes). Swing your arms and lift your knees a little higher as you go.
- Cat-cow (1 minute). On your hands and knees, breathe in as you drop your belly and lift your chest and tailbone. Breathe out as you round your spine and tuck your chin. Move slowly with your breath.
- Shoulder rolls and arm circles (1 minute). Roll your shoulders back ten times, then make slow, big circles with your arms in both directions.
- Hip and ankle circles (1 minute). With your hands on your hips, draw big, slow circles with your hips each way. Then lift one foot at a time and circle the ankle.
Part 2: Low-hammock supported stretches (10 minutes)
Set the bottom of the hammock at about knee height. In the standing stretches, you’ll hold the fabric where it rises from the hammock toward the anchor. Give the hammock a firm tug before each stretch so you know it’s steady.
Supported squat (1 minute)
- Face the hammock and hold the fabric on each side at about chest height.
- Step your feet a little wider than your hips, with your toes turned slightly out.
- Straighten your arms and sit your hips down and back between your heels, as low as is comfortable.
- Breathe in to lengthen your spine, and breathe out to sink a little lower. Hold for 30 seconds, stand up, and repeat once.
Watch for: knees dropping in toward each other. Keep them in line with your toes, and keep your arms straight so your legs do the work.
Standing side stretch (1 minute)
- Stand side-on to the hammock, with your right side nearest it and your feet together, about a foot away.
- Reach both arms up and hold the fabric above head height.
- Push your left hip out to the side, away from the hammock, so your body makes a gentle C-shape and you feel a stretch along your left side.
- Breathe into your left ribs for 30 seconds, then turn around and do the other side.
Watch for: leaning forward. Imagine you’re between two panes of glass and keep the stretch purely sideways.
Standing chest opener (1 minute)
- Stand with your back to the hammock and reach back to hold the fabric with both hands at about shoulder height.
- Step one foot forward, then the other, until your arms are drawn back behind you and you feel a stretch across your chest.
- Breathe in to lift your chest, and keep your neck long and your eyes forward. Hold for 30 seconds, walk back, and repeat once.
Watch for: your lower ribs flaring and your head dropping back. Keep your ribs gently drawn in so the stretch stays in your chest and shoulders, not your lower back.
Hamstring stretch, heel in the hammock (2 minutes)
- Face the hammock and rest your right heel in the lowest point of the loop, with your leg straight or your knee slightly soft.
- Stand tall on your left leg with your toes pointing forward and your hips square. Hold the fabric or rest your hands on your hips.
- Keep your spine long and hinge forward from your hips until you feel a stretch down the back of your right thigh.
- Breathe out and fold a tiny bit further on each breath. Hold for 30 seconds, change legs, and do each side twice.
Watch for: rounding your back to get your chest closer to your knee. A long spine with a smaller fold gives a better hamstring stretch. If you’re working toward the splits, this pairs well with our tips for doing the splits.
Low lunge, back foot in the hammock (2 minutes)
- Stand a short step in front of the hammock, facing away from it. Bend your right knee and rest the top of your right foot in the hammock behind you.
- Step your left foot forward far enough that your left knee stacks over your ankle when you bend it.
- Bend both knees and lower your hips straight down. Gently draw your tailbone down until you feel a stretch in the front of your right hip and thigh.
- Breathe out to sink a little lower. Hold for 30 seconds, change sides, and do each side twice. Stand by a wall or chair if you need help with balance.
Watch for: arching your lower back. The stretch belongs in the front of your hip, so if you feel it in your back, tuck your tailbone a little more and come up higher.
Reclined figure-four (2 minutes)
- Lie on your back on the mat, close enough to rest both calves in the hammock, with your knees bent at about a right angle.
- Take your right foot out and cross your right ankle over your left thigh, just above the knee. Flex your right foot.
- To go deeper, gently press your right knee away from you with your right hand. You should feel the stretch in your right buttock and outer hip.
- Breathe slowly and let your shoulders and jaw relax. Hold for 45 to 60 seconds, then change sides.
Watch for: any pain in the knee of the crossed leg. If you feel it, ease off or skip this one. For a hammock-based hip stretch you can try later, see Anti-Gravity Pigeon in our aerial yoga poses guide.
Part 3: Optional gentle inversion (2 minutes)
This supported forward fold keeps your feet on the floor, but it puts your head below your heart. Head-down positions raise the pressure inside your eyes,3 and in your head, so skip it if you have glaucoma or another eye condition, high or low blood pressure or heart disease, or if you’ve had a stroke, unless your doctor says it’s fine.4 If you’re pregnant, check with your ob-gyn, because doctors advise avoiding activities where you might fall.5 If any of that applies, take an extra minute in child’s pose instead.
Raise the hammock so the bottom of the loop sits at the creases at the front of your hips.
- Face the hammock and step into it, so the fabric sits across your hip creases, below your hip bones. Spread the fabric wide so it doesn’t dig in.
- Hold the fabric, keep your feet on the floor about hip-width apart, and fold forward over the hammock. Lower your hands to the floor or to blocks, letting the fabric take the weight of your hips.
- Walk your hands forward a little and let your heels reach toward the floor, like a supported Downward Dog. Let your head hang and your neck relax for five or six slow breaths.
- Walk your hands back toward your feet, bend your knees and roll up slowly, head last. Pause and breathe before you repeat once, because changing position quickly can make some people dizzy.6
If you’d like to go further with inversions, learn them from a qualified teacher first. Our guide to the benefits of inversion yoga explains what they can and can’t do.
Part 4: Cool-down (3 minutes)
Come down to your mat for the last few minutes. This is where your breathing slows and the stretching settles in.
- Child’s pose (1 minute). Kneel with your big toes together and knees apart, then fold forward with your arms reaching ahead or resting by your sides. Breathe into your back.
- Lying twist (1 minute). Lie on your back with your knees bent and feet on the floor. Stretch your arms out and let both knees fall to one side for 30 seconds, then the other.
- Resting breath (1 minute). Lie flat, or rest your calves in the hammock if it’s still low, and breathe out for a little longer than you breathe in. When you’re done, roll onto your side and sit up slowly.6
For more back-focused work on another day, try our aerial yoga poses for a stronger, more flexible spine.
What I see beginners get wrong when they stretch in a hammock
The hammock makes stretching feel easier, which is lovely, but it brings its own mistakes. These are the ones I correct most often:
- Skipping the warm-up because the hammock “does the work”. Your muscles still need warming up first.
- Letting the fabric take them too deep. Support isn’t the same as readiness. If you couldn’t hold the shape without the hammock, ease off a little.
- Bouncing or pulsing to get further. Hold still and let your breath do it.1
- Putting a foot on the edge of the fabric. Place your heel or foot in the lowest part of the loop, where it won’t slide.
- Holding the breath or clenching the jaw. If you can’t breathe slowly, you’ve gone too far.
Why flexibility matters for aerial yoga
Flexibility is simply how far your joints can move in comfort. Aerial yoga asks a lot of it. Lifting a foot into the fabric at hip height, sitting back into the hammock or opening your legs wide before an inversion all need a fair range of movement in your hips, hamstrings and shoulders.
When a student can’t quite get into a new pose, it’s usually one tight spot holding them back rather than a lack of strength. A bit more range there and the pose suddenly makes sense.
It matters off the hammock too. Muscles that don’t get stretched tend to shorten and tighten, and tight muscles can’t extend all the way when you need them to, which puts you at risk of joint pain and strains.1 Sitting all day is a common example: it tightens your hamstrings, which can make it harder to straighten your knee fully when you walk.1
Safety is the part I care about most as a teacher. Tight muscles that are suddenly pulled into a big stretch can be damaged.1 In a hammock, your body weight and the fabric can take you further than you meant to go, so building your range gradually means your body is ready when a pose asks for it, instead of being forced there.
What stretching can and can’t do for you
Aerial yoga may help your flexibility. In a small 2025 study of sedentary women, eight weeks of aerial yoga mainly improved flexibility, with little effect on balance or core stability.7 Yoga more generally has been linked to better balance in healthy people.2
What stretching won’t do is stop your muscles feeling sore after a workout. A Cochrane review found that stretching before, after, or before and after exercise doesn’t meaningfully reduce muscle soreness in healthy adults.8 So stretch because it helps you move more freely and feels good, not as a cure for sore muscles.
How to get more flexible over time
There’s no quick fix. Muscles can take months to tighten, so it takes weeks to months of regular work to loosen them, and you’ll need to keep going to hold on to what you gain.1 These are the habits I’ve seen make the biggest difference, in my own practice and in my students’.
Build strength alongside stretching
Stretching isn’t the only way to gain range. A 2021 review of 11 trials found that strength training improved range of motion about as much as stretching did, although the studies varied a lot.9 In aerial yoga you want both: the range to reach a shape and the strength to control it. So mix slow squats, lunges and leg lifts through your full range with supported stretches like the ones above.
Stretch when you’re warm
Warm muscles stretch more safely. Five to 10 minutes of light activity is enough, or stretch after a workout.1 The end of an aerial class, when you’re already warm, is my favorite time to work on flexibility.
Let your breathing set the pace
When you hold your breath, your body tends to brace against the stretch. I ease a little deeper on each out-breath and stay still on the in-breath. If your breathing gets short or ragged, back off until it’s slow again.
Stretch little and often
Aim to stretch daily if you can, or at least three or four times a week.1 In my experience, ten minutes on most days does more than one long session on the weekend. On busy days, the low-hammock part of this routine works well on its own.
Don’t overstretch
You should feel tension, never pain, and you shouldn’t bounce.1 Sharp pain, or pain in or around a joint, means stop. The hammock can make it easy to sink too far, so stay at a depth you could control yourself.
Stretch your whole body
Don’t just chase your hamstrings or your splits. The areas that matter most for everyday movement are your calves, hamstrings, hip flexors and the quadriceps at the front of your thighs, and your shoulders, neck and lower back benefit too.1 Aerial yoga also asks a lot of your shoulders and wrists, so give them some attention. I always stretch both sides, even when one feels fine.
Questions people ask about aerial yoga stretches
How long should I hold each aerial yoga stretch?
About 30 seconds, or five or six slow breaths.1 The reclined figure-four can be held a little longer because you’re lying down and fully supported. Don’t bounce, and come out of a stretch if it starts to hurt.
Can I do this routine on a yoga swing with handles?
Yes. Hold the handles wherever the routine says to hold the fabric, and use the seat or the low handles for your heel and foot in the hamstring stretch and lunge. Our guide to yoga swing poses for beginners has more ideas made for handled swings.
Should I stretch before or after aerial yoga?
Warm up before you stretch, because cold muscles are easier to hurt.1 This routine works as a gentle session on its own, or after your aerial practice when you’re already warm.
How long does it take to get more flexible?
Expect weeks to months of regular stretching, not a few sessions, and you’ll need to keep going to keep the gains.1 In the small 2025 study above, sedentary women became more flexible after eight weeks of aerial yoga.7 Stretching most days is the key, and strength work through your full range can help too.9
Do I have to go upside down?
No. Every stretch in Parts 1, 2 and 4 keeps you the right way up, and the inversion in Part 3 is optional. Many of my students stretch happily for months before they ever try one. When you’re ready, read our guide to whether aerial yoga is safe and learn inversions with a teacher.
Sources
- Harvard Health Publishing, “The importance of stretching”, 2024. ↩︎
- National Center for Complementary and Integrative Health (NCCIH), “Yoga: Effectiveness and Safety”. This covers yoga in general, not aerial yoga. ↩︎
- Jasien JV, et al., “Intraocular Pressure Rise in Subjects with and without Glaucoma during Four Common Yoga Positions”, PLoS One, 2015. ↩︎
- Cleveland Clinic, “Inversion Tables Might Flip the Script on Back Pain”, 2025. ↩︎
- American College of Obstetricians and Gynecologists (ACOG), “Exercise During Pregnancy”, September 2024. ↩︎
- NHS, “Low blood pressure (hypotension)”. ↩︎
- Demirli A, et al., “Effects of Aerial Yoga and Reformer Pilates on Core Stabilization, Flexibility and Balance: A Comparison on Sedentary Women”, Journal of Sports and Science, 2025. A study of 36 sedentary women over eight weeks. ↩︎
- Herbert RD, de Noronha M and Kamper SJ, “Stretching to prevent or reduce muscle soreness after exercise”, Cochrane Database of Systematic Reviews, 2011. ↩︎
- Afonso J, et al., “Strength Training versus Stretching for Improving Range of Motion: A Systematic Review and Meta-Analysis”, Healthcare, 2021. A review of 11 randomized trials with 452 participants. ↩︎
Get Aerial Yoga Tips Sent Directly to Your Inbox
Join our mailing list to be the first to know about the latest aerial yoga news and products. We only include the best content in our newsletter, which includes marketing material. Read our Privacy Policy