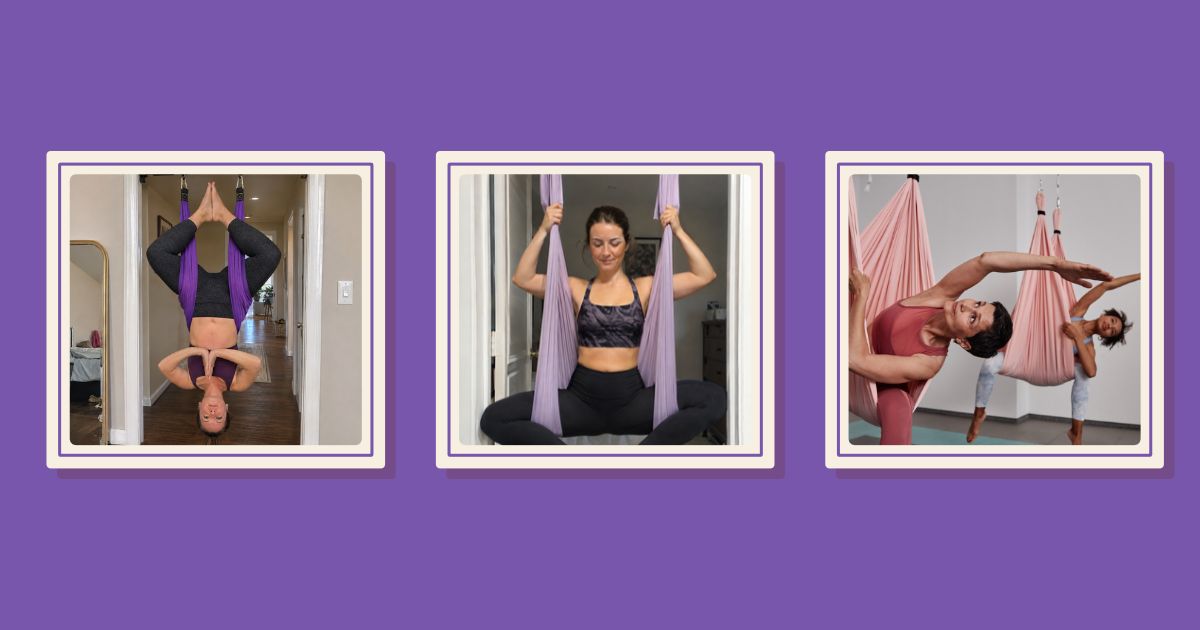
A yoga swing with handles is one of the friendliest ways into aerial yoga. The handles give you something solid to hold, the padded seat takes your weight, and most of the poses below keep at least one foot on the floor.
I’ve practiced aerial yoga since 2008 and taught it as a qualified yoga teacher for years, on handled swings as well as fabric hammocks. The poses that help beginners most aren’t the dramatic upside-down shapes in the photos. They’re the simple stretches and holds that teach you to trust the swing and move with control.
This guide is for yoga swings and trapezes with handles. If you have a long fabric hammock with no handles, start with our essential aerial yoga poses instead, because the shapes are different.
What are the best yoga swing poses for beginners?
The best beginner yoga swing poses keep your feet on or near the floor: a supported seat, a supported squat, a standing chest opener, a hamstring stretch, a low lunge, a suspended plank and a supported forward fold. Master these before you try a full inversion, and learn inversions with a qualified teacher.1
Yoga swing, yoga trapeze or aerial hammock: what’s the difference?
A yoga swing or yoga trapeze hangs from a single point and has a short, padded seat (some makers call it the sling or saddle) with two or three pairs of handles: usually an upper pair you reach overhead for, a middle pair around waist height, and on many swings a low pair or padded foot stirrups. If you’ve searched for “aerial sling poses”, this is probably the kind of swing you mean.
An aerial hammock is a long piece of soft fabric with no handles that you wrap, sit and lie in. In my classes, beginners usually feel safer on handles straight away. Our roundup of the best aerial yoga hammocks and swings compares both.
Before you start: set-up and safety
Check your swing every time
Before every session I check what I’d check before a class: the anchor, every carabiner gate closed and locked, the straps for fraying, and the stitching on the seat and handles. Then I hang my weight from the swing with my feet still on the floor.
If you haven’t hung your swing yet, our aerial rigging guide and our guide to using a yoga swing in a door frame cover the options. Every part should be rated well above your body weight, and our guide to aerial yoga weight limits explains what those ratings mean.
Set the height and dress for it
Most of these poses need the seat at about hip height, and a few work better lower. Practice changing the height (with daisy-chain loops, extension straps or built-in loops) before you start. Wear fitted clothes that cover the backs of your knees and your underarms, and take off rings and watches. Our guide to what to wear for aerial yoga has more.
Check with your doctor if this applies to you
Learning yoga on your own without supervision has been linked to a higher risk of injury, so learn the basics from a qualified teacher if you can, in person or live online. Pregnant women, older adults and people with health conditions should talk to their doctor and their teacher about what suits them.1
The supported forward fold puts your head below your heart. Head-down positions raise the pressure inside your eyes,2 and in your head, so talk to your doctor first if you have glaucoma or another eye condition, high or low blood pressure, or heart disease, or if you’ve had a stroke.3 If you’re pregnant, check with your ob-gyn, because doctors advise avoiding activities where you might fall.4 Have someone nearby the first time you try anything new.3
The 7 beginner yoga swing poses at a glance
| Pose | Swing set-up | What it works | Feet on the floor? |
|---|---|---|---|
| 1. Swing Seat | Seat at about hip height | Getting used to the swing, gentle core work | Yes, to start |
| 2. Supported Squat | Middle handles | Hips, ankles and thighs | Yes |
| 3. Standing Chest Opener | Upper handles | Chest, front of the shoulders, upper back | Yes |
| 4. Supported Hamstring Stretch | Seat or low handles, knee to hip height | Backs of the legs, balance | One foot |
| 5. Supported Low Lunge | Low handles or foot stirrups, about knee height | Front of the hip and thigh, balance | One foot |
| 6. Suspended Plank | Low handles or foot stirrups, about knee height | Core, shoulders and arms | No, hands on the floor |
| 7. Supported Forward Fold | Seat at hip-crease height | Backs of the legs, spine, shoulders (head below heart) | Yes |
Hold each pose for about 30 seconds, or five or six slow breaths, unless the pose says otherwise. Stretch to a point of tension, never pain, and don’t bounce.5
1. Swing Seat
Every other pose is easier once you trust the seat, so I always teach this first. Set the bottom of the seat at about hip height.
- Stand with your back to the swing and hold the edges of the seat or the middle handles, one on each side of your hips.
- Bend your knees and sit back, so the seat sits under your buttocks and the tops of your thighs, not across your lower back.
- Sit tall, then lift one foot, then the other, an inch off the floor and let the swing take your weight.
- Breathe slowly for five or six breaths. To get out, put both feet down, stand up and step forward.
What it works: trust in the swing, your grip and gentle core control.
Easier option: keep both feet on the floor and just sit and breathe.
Common mistake: perching on the front edge of the seat, or letting it ride up to your waist. Both make the swing tip you backward. Sit deep into it.
2. Supported Squat
- Stand facing the swing, about an arm’s length away, and hold the middle handles.
- Step your feet a little wider than your hips, with your toes turned slightly out.
- Straighten your arms and sit your hips down and back between your heels, as low as feels comfortable, letting the handles take some of your weight.
- Keep your knees in line with your toes and lengthen up through the crown of your head. Hold, then press through your feet to stand, keeping your arms straight.
What it works: your hips, ankles and thighs.
Easier option: stop at a half squat, or put a rolled-up mat under your heels.
Common mistake: pulling on the handles with bent arms and hunched shoulders. Keep your arms long and let your legs do the work, and don’t let your knees drop in toward each other.
3. Standing Chest Opener
Desk workers in my classes sigh with relief in this one.
- Stand with your back to the swing, close to it, and reach back to take one upper handle in each hand.
- Walk forward, one foot in front of the other, until the handles draw your arms back and up behind you and you feel a stretch across your chest.
- Lift your chest, draw your lower ribs in and keep your neck long. Look forward, not up.
- Breathe into the front of your chest. To come out, walk back toward the swing until your arms relax.
What it works: your chest, the front of your shoulders and your upper back.
Easier option: hold the middle handles instead, or take a smaller step forward.
Common mistake: walking so far forward that the handles yank your shoulders, or dropping your head back and sinking into your lower back. If you’ve had a shoulder injury, keep this one small and ask a teacher about it.
4. Supported Hamstring Stretch
Lower the seat or a low handle to somewhere between knee and hip height. Lower is easier, so start there.
- Face the swing. Rest your right heel in the seat or the low handle, with your leg straight or your knee slightly soft.
- Stand tall on your left leg with your toes pointing forward and your hips square to the swing. Rest your hands on your hips or hold the middle handles.
- Keep your spine long and hinge forward from your hips until you feel a stretch down the back of your right thigh.
- Let each out-breath soften the stretch a little, then change legs.
What it works: your hamstrings and calf, and because the swing moves a little, your balance.
Easier option: set the swing lower, bend the lifted knee, or stand by a wall you can touch.
Common mistake: rounding your back to bring your chest to your knee, which moves the stretch into your back. Keep your chest open and fold from the hips, and check that your lifted hip hasn’t hitched up.
5. Supported Low Lunge
This stretches the front of the hip, which gets tight when you sit a lot. Set the low handles or foot stirrups at about knee height.
- Stand a short step in front of the swing, facing away from it. Bend your right knee and slip the top of your right foot into a low handle or stirrup behind you.
- Step your left foot forward far enough that your left knee stacks over your ankle when you bend it.
- Bend both knees and lower your hips straight down, back knee pointing at the floor. Gently draw your tailbone down until you feel a stretch in the front of your right hip and thigh.
- Hold with your hands on your hips, then step your left foot back, take your right foot out carefully and change sides.
What it works: the front of the back hip and thigh, plus front-leg strength and balance.
Easier option: set the handle lower, take a shorter stance, and hold a wall or sturdy chair.
Common mistake: arching your lower back to go deeper. You should feel this in the front of your hip, not your back. If your back complains, tuck your tailbone more and come up higher.
6. Suspended Plank
A plank with your feet in the swing is harder than one on the floor, because your body has to keep the swing still. Set the low handles or foot stirrups at about knee height or a little lower.
- Kneel on all fours facing away from the swing, with the stirrups just behind your feet.
- One at a time, slide your feet into the stirrups so the tops of your feet and the fronts of your ankles rest in them.
- Place your hands under your shoulders, press the floor away and lift your knees until your body makes a straight line from heels to head.
- Hold for 15 to 30 seconds, breathing steadily. Lower your knees before you take your feet out.
What it works: your core, shoulders and arms.
Easier option: keep your knees on the floor with your feet in the stirrups, or set the stirrups lower.
Common mistake: letting your hips sag, which strains your lower back, or piking them high. Think of a long, straight line, and stop when you can’t hold it.
7. Supported Forward Fold
Your feet stay on the floor, but your head goes below your heart, so read the health advice above first. Set the seat at the crease where the front of your thighs meets your hips.
- Face the swing and step into it, so the seat sits across the creases at the front of your hips: below your hip bones, not across your belly.
- Hold the sides of the seat or the middle handles, feet about hip-width apart.
- Keeping your feet on the floor, fold forward over the seat and lower your hands to the floor or to yoga blocks, letting the seat take the weight of your hips.
- Walk your hands forward a little and let your heels reach toward the floor, like a supported Downward Dog. Let your head and neck relax for five or six breaths.
- To come out, walk your hands back toward your feet, bend your knees and roll up slowly, head last. Pause before you move on, because changing position quickly can make some people dizzy.6
What it works: the backs of your legs, the length of your spine and your shoulders.
Easier option: put your hands on blocks or a chair seat, bend your knees, and keep the hold short.
Common mistake: setting the seat too high, so your feet float and you tip forward, or too low, so it presses into your stomach. Coming up too fast is the other one I see all the time.
A simple 15-minute beginner yoga swing sequence
Once you know the poses, string them together like this:
- Warm up on the floor for five minutes. Our 20-minute aerial yoga stretching routine has a warm-up you can borrow.
- Swing Seat for a minute, then two holds each of the Supported Squat and Standing Chest Opener.
- Supported Hamstring Stretch and Supported Low Lunge on each leg.
- Two Suspended Planks, then the Supported Forward Fold, coming up slowly.
- Finish with a minute of slow breathing, sitting in the swing or lying on your mat.
What I see beginners get wrong on a yoga swing
The same habits come up in almost every beginners’ class I teach:
- Gripping for dear life. White knuckles and shoulders up by your ears tire you out fast. Hold firmly, and let your legs and the seat do more of the work.
- Putting up with the wrong height. A seat that’s a few inches off makes every pose harder. Adjust it, and note which loop you used for each pose.
- Holding the breath. If you can’t breathe slowly, you’ve gone too far.
- Chasing depth. The swing makes it easy to sink further than your body is ready for. Stop at tension, not pain.5
- Rushing the way out. Put your feet down and steady yourself before you let go of anything.
What about full inversions on a yoga swing?
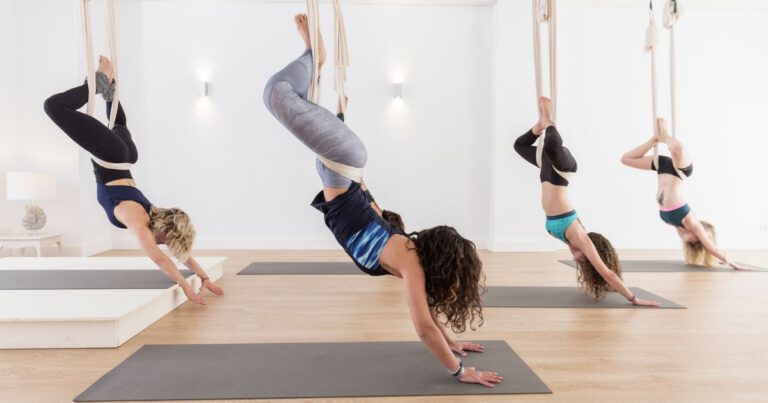
Most yoga swing photos show someone hanging fully upside down with their legs hooked around the straps. I love teaching inversions, but I don’t teach them from a page.
The way in, the leg lock and the way down are where beginners get into trouble, and a teacher can see what you can’t. When these seven poses feel steady, learn your first full inversion in a class or live online session. Our guides to the benefits of inversion yoga and whether aerial yoga is safe are good reading first.
Which swing works best for these poses?
Any well-made swing with handles at two or three heights and a published load rating will do. Our guide to aerial yoga equipment for home covers the rest of the set-up.
One handled swing still sold by its maker is the Omni Gym Swing Pro, with padded foot stirrups and loops in the middle handles that move the seat from waist level to the floor. Omni Gym says the fabric is stress tested to 500 lb; that’s a test load, not a working limit, so your weight should sit well below it.
Best for: Beginners who want handles and padded foot stirrups
Omni Gym Swing Pro
A handled yoga swing with padding in the seat and foot stirrups, and built-in loops that make height changes quick.
- Six handles at three heights, the lowest pair padded foot stirrups
- Built-in height-adjust loops in the middle handles
- One-year parts warranty and a 30-day money-back guarantee
- Publishes a 500 lb stress test, not a working load limit
- Built for handled poses, not hammock wraps or cocoon poses
Questions people ask about yoga swing poses
Are yoga swings good for beginners?
Yes. The handles and padded seat give you more support than a fabric hammock, so most beginners feel secure quickly. Start with poses that keep your feet on or near the floor, and learn full inversions with a qualified teacher.
How high should my yoga swing hang?
For most beginner poses, set the bottom of the seat at about hip height. Lower it to knee height or below for leg stretches and planks, and set it at your hip creases for forward folds. Check the maker’s instructions for the clearance it needs under the seat.
How often should I practice yoga swing poses?
Two or three short sessions a week is a good start while your body gets used to hanging. Gentle stretching can be more frequent: Harvard Health suggests stretching daily, or at least three or four times a week.5 Rest if anything feels sore or strained.
Sources
- National Center for Complementary and Integrative Health (NCCIH), “Yoga: Effectiveness and Safety”. This covers yoga in general, not aerial yoga. ↩︎
- Jasien JV, et al., “Intraocular Pressure Rise in Subjects with and without Glaucoma during Four Common Yoga Positions”, PLoS One, 2015. ↩︎
- Cleveland Clinic, “Inversion Tables Might Flip the Script on Back Pain”, 2025. ↩︎
- American College of Obstetricians and Gynecologists (ACOG), “Exercise During Pregnancy”, September 2024. ↩︎
- Harvard Health Publishing, “The importance of stretching”, 2024. ↩︎
- NHS, “Low blood pressure (hypotension)”. ↩︎
Get Aerial Yoga Tips Sent Directly to Your Inbox
Join our mailing list to be the first to know about the latest aerial yoga news and products. We only include the best content in our newsletter, which includes marketing material. Read our Privacy Policy