
Handstands are the single most impressive thing you can do in the gym. They look cool, they’re fun, and they’re a lot harder than they look. But if you want to learn how to do a handstand, it can seem like an impossible task.
The good news is that it’s not! Handstands are an awesome exercise because they work your upper body, lower body, and core muscles at the same time. They also help improve balance and coordination — plus they’re really fun!
Handstands are an impressive feat of strength and balance. But if you’re a beginner, it can be tough to know where to start.
f you’re new to handstands or have never done them before, learn from someone who has experience instructing people how to do them safely and correctly. A good instructor will give you all the information you need about how perform a handstand safely — including what not to do!
Here are some tips to get you started
1. Practice Your Handstands As Often As You Can
They say that practice makes perfect.
The best way to improve your handstand is to practice it as often as possible. You don’t need any special equipment or training to get started. Just do handstands whenever you have the opportunity! This can be during your morning routine or before bed at night.
When we say “practice your handstands” that doesn’t necessarily mean spending hours kicking up into the air. You could spend this time conditioning, straightening and stretching towards your goal.
2. Spend Time Strengthening Your Wrists
To be able to do handstands well, it’s important that you have strong wrists. Strong wrists are a core component of a good handstand.
Here are some tips for strengthening your wrists for handstand practice:
Hold a dumbbell in each hand and rest your arms on the ground behind your head with palms facing up. Raise the weights out in front of you so that they are just above shoulder level — but leave them there! Do not move them!
Hold this position for 5 seconds and then slowly lower them back down until they touch the floor behind your head again. Repeat this exercise 12 times per set.
Perform this exercise three times per week or as often as needed to maintain strength in your wrists.
2a. Try a Gyroball For An INSANE Wrist Workout
The gyroball is a great tool for improving your wrist strength, which is vital for holding yourself up in a handstand position. It’s also effective at improving shoulder stability and strengthening your core muscles.
The gyroball is a fitness tool that’s been popular across Europe for quite some time. I use my gyroball when sitting watching tv in 5 minute bursts in each hand.


3. Spend Time Strengthening Your Shoulders
Most people who struggle with handstands tend to have weak shoulders and arms. If you want to do a great handstand, you need strong shoulders and arms. So spend some time strengthening these muscles before you even start practicing the pose itself.
Believe it or not, strong shoulders are essential for handstands because your arms are straight and ‘locked’ in position, so your shoulders are supporting your whole back and spine.
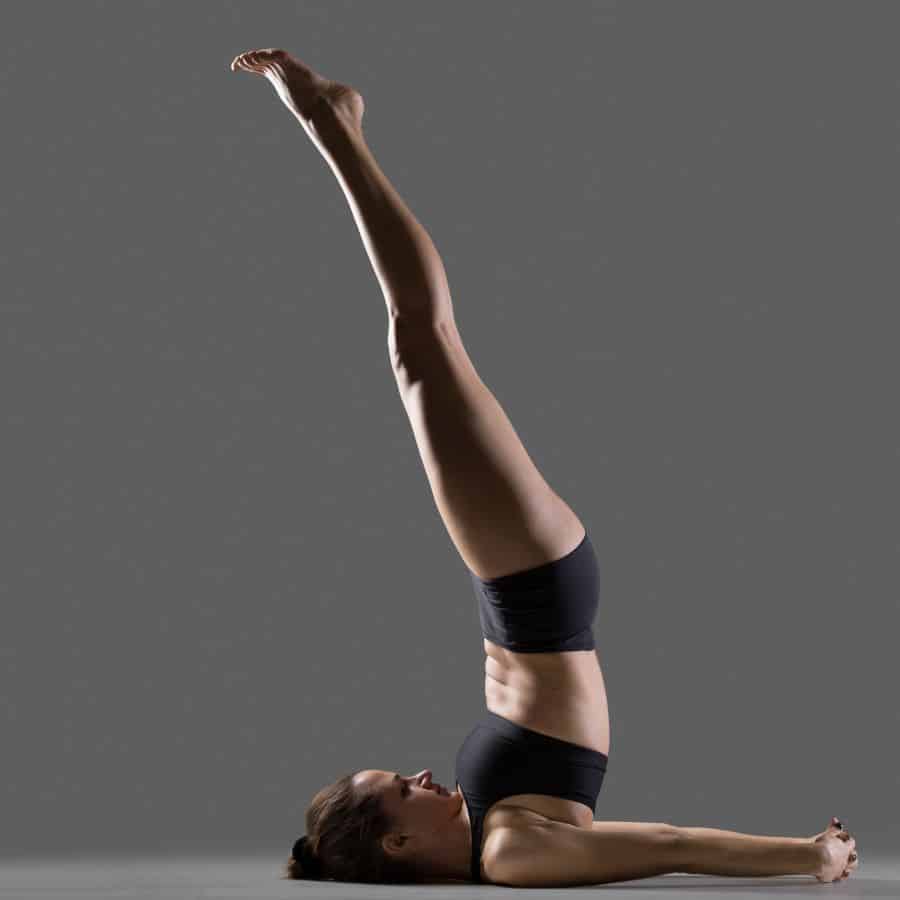
Shoulder Stands
Lie on your back with your legs bent at a 90-degree angle and knees drawn toward your chest. Bend at the hips so your lower back is flat against the floor.
Place your hands under your buttocks and bring them forward until they touch the floor next to each other. Bend one elbow at a time and place each hand on its corresponding knee for support.
Straighten both legs so they are parallel with each other above you with heels touching. Your toes should be pointing toward the ceiling.
4. Don’t Neglect Your Core Strength
Handstands require good balance, flexibility and core strength. If you have any of these issues, it’s a good idea to practice them on a soft surface like grass or a carpeted floor so that you don’t hurt yourself if you fall.
Here are some tips for building up your core strength:
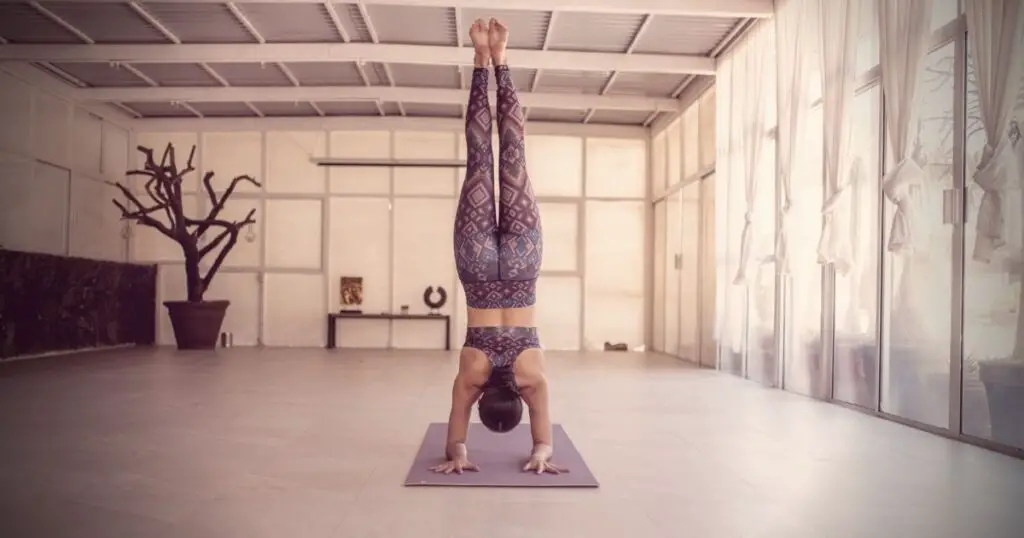
Practice yoga. Yoga is an excellent way to build core strength and improve your balance. Look for classes that include arm balances and inversions like headstands and handstands.
Do planks regularly. Planks are one of the best exercises for strengthening the abs, lower back and shoulders — all of which are important for achieving a perfect handstand position. Start by holding a plank for 10 seconds, working up to 1 minute or longer as you improve over time. You can also add variations like side planks or elbow planks to help work on different parts of your core.
5. Practice Your Handstands With A Partner
Here are a couple of different ways you can work on your handstands with a partner:
Have Your Partner Spot You While You’re in Handstand Position
This is one of the best ways to practice because it allows you to focus on your form while someone else ensures that you don’t fall over. If you feel like your form is off, have your partner point out what’s wrong so you can correct it right away instead of after dropping into a pile on the floor!
Have Your Partner Hold Your Feet While You Practice Handstands (Or Vice Versa)
This is another great way to work on form while ensuring that they won’t fall over while attempting their first one-legged handstands. This can also be helpful if you’re having trouble getting up from a prone position into a standing position by using momentum rather than strength alone.
6. Perform Dynamic Stretches Before Each Workout
One of the most important things to remember when learning to do a handstand is to stretch before each workout.
Dynamic stretches are preferable over static stretches because they are more functional, meaning your body will be able to use them in more ways than just stretching out your hamstrings.
Dynamic stretches target all the major muscle groups and joints of your body, so they will help you to become more flexible and mobile.
These stretches are usually done at a slow pace, but with high intensity.
For example, you might do a lunge and then raise one foot off the ground as you lunge, or do an overhead shoulder press while walking forward.
These types of dynamic stretches can help improve your balance and stability as well as increase circulation throughout your body.
7. Work On Your Grip Strength
Grip strength is a key component of handstands. You know what I mean, right? You’re in a handstand and you can’t hold it for more than a few seconds. Well, there’s a good chance that your grip is the culprit.
Your hands don’t actually grip the floor when you’re in a handstand, but you do engage the muscles in your hand in a particular way that’s similar to grip. The pressure that’s spread throughout your finger tips is paramount to a successful handstand.
The reason why most people have weak grips is because they don’t work on them enough.
It’s not like we just sit around all day with our hands hanging down by our sides. We do stuff with our hands all the time, but we don’t always focus on strengthening them.
There are plenty of awesome grip strengthening equipment available for just a few dollars!


8. Practice Your Handstands Against A Wall Or DoorFrame
If you don’t have enough strength in your arms yet, try practising against a wall or doorframe instead of trying to balance yourself upright on your hands. This will give you more stability and make it easier for you to get used to balancing yourself upright on your hands without falling over!
First, get yourself into the position shown above (against the wall) with your feet together and arms outstretched above your head. You should then move your feet apart until they touch the wall on either side of your body. This will help with balance while also allowing you to lean forward and relax slightly when necessary.
Once in this position, focus on keeping all of your weight balanced on your hands and toes. Make sure that there’s no pressure being put onto any part of your body other than those two areas mentioned above!
When you perfect your wall-assistant handstands, it’s time to work towards freestanding handstands next!
9. Use A Pole Dancing Pole For Support
You can also use a pole dancing pole for support when practising your handstand. This is an excellent piece of handstand apparatus because you can use it on so many different ways:
- You can face the pole before starting your handstand, with the aim of gripping it with your ankles.
- Another way is to start with your back to the pole, bend forward towards the floor then lift each leg up onto the pole, one at a time, then walk backward with your hands
- If you’re able to climb the pole, you can dismount into a handstand in a few different ways; from a cross-knee release, a cross-ankle release or from an inverted crucifix position.

10. Always Warmup Before Your Handstand Practice Sessions
Warming up is one of the most important parts of your handstand practice session. If you don’t warm up properly, you can end up injuring yourself. There are many different ways to warmup before a handstand practice, but here are some of my favorites:
Run 10-20 minutes on a treadmill or elliptical machine. This will get your heart rate up and help with circulation in your legs.
Do light jogging lunges for about 10 minutes (alternate legs). These will help get blood flowing into your legs, which is very important when trying to master the handstand position.
Do light push ups (about 20 reps) to stretch out your shoulders and chest area. This helps prevent injury to those joints as well as improves strength in this area for balancing purposes.
11. Try Wall Walking
Try walking backwards up a wall in order to achieve a handstand.
It sounds crazy to type that out, but hear me out!
To achieve this feat, you need to walk backwards up the wall and then place your feet together on the ground. Then, you will use your arms to lift your body up, bringing your legs above your head.
This is a great way to build strength and flexibility in your body and it also helps you learn how to balance yourself while upside down.
It is important that you keep your back straight as you are doing this activity, so that you do not hurt yourself or strain your muscles.
If you have never tried this before, then it may take some time before you get the hang of it but once mastered, it will become easier each time until one day you can do it without any problems at all!
12. Practice Momentum And Leg Swings In A Safe Area
‘The swing’ will be a big part of your training when you’re learning to handstand! You need a large enough area to do this safely.
When I started training for handstands, my workout space was ridiculously small and there were other bits of aerial apparatus in the way that really hindered my progress.
You can even practice leg swings and momentum without actually kicking up into a handstand.
13. Always Use A Crash Mat
Safety comes first.
A crash mat is a type of mat used for gymnastics, martial arts, and other activities. This kind of mat is designed to be used for activities that may involve falling or jumping onto the floor.
The mat has a thick foam cushion that absorbs impact from falls and can protect people from injuries.
Crash mats are also commonly used in gymnastics and martial arts training. These mats help protect the floor from damage while also providing students with a safe place to practice stunts or fall without getting hurt.
Read our guide for the best circus-level crash mats for home fitness enthusiasts.
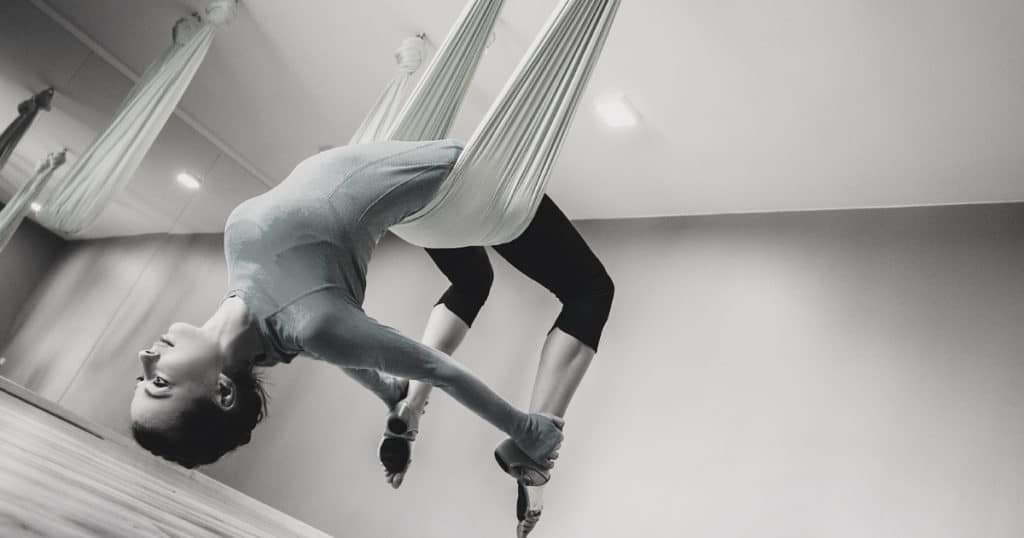
14. Start Inverting With A Yoga Hammock
A yoga hammock or swing is such a useful tool for handstand training. The swing pictured below by YogaBody is so innovative with the foam handles – it will prove itself invaluable in now time.


15. Take Photos To Monitor Your Progress
The best way to keep track of your progress is to take photos every week or two. (Or whenever you feel like it.) This will help you see how far you’ve come and give you something to look forward to.
When I was learning how to handstand, I’d take one photo every week or two so that I could see my progress in writing on my wall calendar.
If I felt like I wasn’t making any improvements, I’d go back and look at my previous photos and realize that yes, there had been improvement even though it didn’t feel like it at the time!
Get yourself a small phone tripod to hold your phone in position – you’ll be able to see your lines in the photos and identify areas for improvement.
16. Don’t Get Disheartened If You Can’t Do A Handstand Right Away
The handstand is one of the most iconic poses in yoga. It’s also one of the most challenging.
“The handstand is not a beginner pose,” says Shanti Prakash, an instructor at YogaPoint Collective. “It’s an advanced pose that requires strength, balance, flexibility and focus.”
Don’t rush yourself. The best way to get better at anything is by practicing it over time. “You won’t learn how to do a handstand overnight,” says Aliza Cushner, a yoga instructor in Los Angeles. “It’s something that takes time and dedication.”
Practice doing handstands with your feet on the floor until you feel comfortable enough with the movement before attempting them against a wall or other surface. You’ll want to be able to hold yourself up for at least 30 seconds before trying it without assistance.
Work on strength-building moves such as push-ups and triceps dips while you’re learning how to do a handstand so that your body becomes accustomed to holding itself up in an inverted position.
See also: 17 tips for doing the splits
17. Focus On Learning Good Handstand Form
When you first start learning handstands, you should focus on learning good form and getting comfortable with the movement. Handstands can take a while to learn, so it’s important that you learn the right way so that you don’t injure yourself.
Just like with everything, there’s a right way and a wrong way to do things, handstands are no exception.
Except, if you pick up bad form when learning how to do a handstand, you risk injuring yourself which could set you back for months.
Nobody wants that!
Bad form is a habit that’s exceptionally difficult to break, so learn good form as early as possible for the best results.
18. Work On Your Exits
Getting into a handstand position is one thing, but what about exiting gracefully?
A flawless and silent exit from our handstands is the goal, so make sure you’re working on the way you exit your handstands as well as how to enter them.
19. Set Yourself Measurable Goals To Work Towards
It’s important to have a clear objective when you begin learning handstands. A good goal would be to be able to hold your handstand for at least 10 seconds.
Once you achieve that milestone, set another goal for yourself and continue working towards it until you can hold your handstand for 30 seconds or more without assistance.
You should start with small incremental goals as well as large ones so that you stay motivated throughout the process of learning how to do a handstand.
For example, goals could be:
- Successfully do a tucked handstand and hold for 30 seconds
- Hold a handstand against the wall for 2 minutes
- Do a full handstand push-up against the wall
- Etc
20. Use Wrist Wraps For Extra Wrist Support
Handstand training can be tough on your wrists. The best way to protect your hands is to learn proper technique and build up strength. Many people find wrist wraps useful for extra wrist support during handstand training.
Wrist wraps are long strips of cloth or other material that wrap around the forearm and wrist. They’re used by many athletes, including weightlifters, gymnasts, rock climbers, martial artists, and football players. Wrist wraps can help prevent injuries by providing extra support for muscles and tendons in the wrists and forearms.


Conclusion
Handstand training is one of the most rewarding workouts out there. It is also one of the most challenging. The ability to hold a handstand will make you feel like you can do anything.
Hopefully, you found this article helpful in starting some handstand training.
The most important thing you can do is have patience with the process. I’m not saying everything will come rushing back to you straight away. Give it a little while and it will all fall into place.
Be diligent and don’t give up!
Get 10% off Aerial Yoga Clothing & Equipment with Uplift Active
Use the discount code POLEFIT10 at the checkout
This article is tagged with:


Get Aerial Yoga Tips Sent Directly to Your Inbox
Join our mailing list to be the first to know about the latest aerial yoga news and products. We only include the best content in our newsletter, which includes marketing material.
Read our Privacy Policy
You have Successfully Subscribed!
Spam Free Guarantee. You can unscubscribe at any time.